Preserve Your Legacy: Essential Cast Iron Seasoning Steps
There's an undeniable magic to cooking with cast iron cookware. From the rich, even heat it provides to the unparalleled flavor it imparts to your dishes, a well-loved cast iron skillet or Dutch oven is often considered a kitchen's most cherished workhorse. But beyond its culinary prowess, cast iron holds a unique place in many homes as a tangible link to family heritage. Many pieces, passed down through generations, tell stories of countless meals cooked with love, becoming priceless heirlooms in their own right. This connection is why understanding
cast iron 101: how to season cast iron is not just about maintenance; it's about preserving a legacy.
Proper care ensures these durable pieces last for centuries, enabling you to pass them on, just as they were passed to you. A key component of this care is seasoning – a process that transforms bare iron into a naturally non-stick, rust-resistant surface, ready for a lifetime of culinary adventures. If you’ve inherited a piece from your grandmother, found a hidden gem at a flea market, or simply want to maximize the life of your new skillet, mastering the art of seasoning is fundamental.
Why Seasoning Your Cast Iron is Crucial
At its heart, cast iron seasoning is about creating a protective layer that enhances both the performance and longevity of your cookware. When oil is applied to cast iron and then heated to its smoke point, it undergoes a process called polymerization. This transforms the liquid oil into a hard, plastic-like coating that bonds to the iron. This polymerized fat acts as a natural barrier, offering several key benefits:
- Natural Non-Stick Surface: A properly seasoned pan develops a slick surface that food won't stick to, making cooking and cleanup a breeze without relying on synthetic coatings.
- Rust Prevention: Bare cast iron is highly susceptible to rust. The seasoned layer seals the iron, preventing moisture and oxygen from causing corrosion.
- Improved Flavor: As the seasoning builds up over time, it contributes a subtle, desirable depth of flavor to your food, a characteristic often celebrated by cast iron aficionados.
- Enhanced Durability: The robust, polymerized layer helps protect the iron from minor abrasions and wear, making the cookware even more resilient.
Think of seasoning as building up a protective, non-stick shield. It's an ongoing process, with each cooking session contributing to a stronger, darker, and more effective seasoning layer.
Cast Iron 101: The Essential Steps to Seasoning Your Cast Iron
Whether you're restoring a treasured antique or preparing a brand-new pan for its first use, the fundamental steps for how to season cast iron remain consistent. Let's dive into the process to ensure your cast iron is ready to perform at its best.
1. Cleaning Your Cast Iron for Seasoning
The first and most critical step is to ensure your cast iron is absolutely clean, free from any rust, grime, old flaky seasoning, or food residue. This creates a pristine surface for the new seasoning to adhere to properly.
Options for a Deep Clean:
- Thorough Scrubbing: For moderately dirty or rusty pieces, a vigorous scrub can work wonders. Use hot water and a stiff brush, nylon scrubber, or even steel wool. Contrary to popular myth, a little soap won't harm your cast iron if you're planning to re-season it immediately after. The goal here is a completely bare, clean surface. For detailed cleaning tips, check out our guide on Effortless Cast Iron Care: Simple Steps for Non-Stick Cooking.
- Sandblasting (Walnut Shell Method): For heavily rusted or caked-on residue that scrubbing can't conquer, professional sandblasting is an option. It's crucial to specify the "walnut shell" method or a similar non-abrasive medium. Standard sandblasting can pit the iron, but walnut shells are gentle enough to strip away grime without damaging the metal itself. Many auto collision centers or specialty shops offer this service.
- Oven Self-Clean Cycle: Some people opt to use their oven's self-cleaning cycle. Place the cast iron piece (upside down) in the oven, with a sheet of foil underneath to catch any burning residue. The extreme heat will burn off all old seasoning and rust. While effective, exercise caution as this method generates intense heat and fumes, and some express concern about potential thermal shock to the cast iron, though it's generally robust enough to handle it. Ensure good ventilation.
- Chemical Stripping/Electrolysis: For truly neglected pieces, a lye bath (caustic soda solution) or an electrolysis tank can effectively remove decades of crud and rust. These methods are advanced and require significant safety precautions (gloves, eye protection, ventilation). They are highly effective for restoration but are generally not necessary for routine seasoning.
Whichever method you choose, the aim is to get your cast iron back to its original, dull grey metal state. Any old gunk left behind will result in an uneven, peeling, or sticky new seasoning.
2. Thorough Drying is Key
Once your cast iron is heavily cleaned, it's paramount to get it bone dry immediately. Bare iron will begin to rust almost instantly if left with any moisture.
- Rinse Well: After cleaning, rinse the piece thoroughly under running water to remove all cleaning agents and debris.
- Wipe Dry: Use a clean cloth or paper towel to wipe off as much water as possible.
- Heat Dry on Stovetop or in Oven: Place the cast iron on your stovetop over low to medium heat, or in a preheated oven (e.g., 200°F / 93°C) for 5-10 minutes. This ensures every last bit of moisture evaporates, preventing flash rust. You'll see steam rise as it dries.
3. Applying the Seasoning Oil (Rub It In)
While your cast iron is still warm from drying (this helps the oil spread and penetrate), it’s time to apply a thin layer of seasoning oil. The choice of oil matters, as different oils have different smoke points and polymerization properties.
Popular Oil Choices:
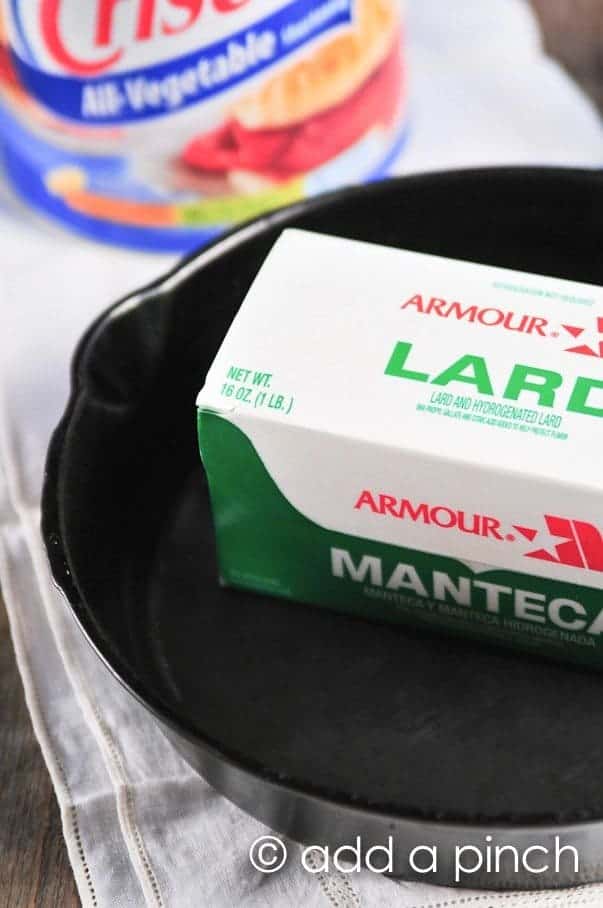
- Vegetable Shortening or Lard: Traditional and effective, these fats polymerize well and create a durable, slick surface.
- Grapeseed Oil: Known for its high smoke point and neutral flavor, it's a popular choice for initial seasoning.
- Canola Oil: Readily available and affordable, it performs well for seasoning.
- Flaxseed Oil: While excellent for creating a very hard, durable seasoning (often compared to enamel), it can be prone to flaking for some users and is more expensive.
- Avocado Oil: With a very high smoke point, it’s great for both seasoning and cooking at high temperatures.
Using a lint-free cloth or paper towel, carefully rub a *very thin* film of your chosen oil over the entire surface of the cast iron – inside, outside, handles, and even the bottom. The key here is *thin*. You want just enough to coat it, but not so much that it looks greasy or wet.
The "Wipe Away Excess" Rule:
After coating, take another clean, dry paper towel (or several) and wipe away as much oil as you possibly can. Seriously, wipe it until it looks like there's no oil left, as if you're trying to remove it completely. If you leave too much oil, it will become sticky, gummy, or even peel when baked, leading to a frustrating re-do. A well-wiped pan should appear almost dry, but with a slight sheen.
4. Baking for Polymerization
This is the magical step where the oil transforms into that hard, protective seasoning layer. This step was not explicitly detailed in the reference, but it's absolutely essential for proper seasoning.
- Preheat Oven: Preheat your oven to a temperature between 450°F and 500°F (230°C to 260°C). High heat is crucial for the oil to polymerize correctly.
- Place Cast Iron Upside Down: Place your thinly oiled cast iron piece upside down on the middle rack of your preheated oven. Placing it upside down helps prevent excess oil from pooling.
- Foil Underneath: Place a sheet of aluminum foil on the rack below to catch any drips that might escape, saving you from a smoky mess.
- Bake for One Hour: Allow the cast iron to bake for at least one hour at this high temperature. During this time, the oil will polymerize and bond with the iron.
- Cool Down Slowly: After an hour, turn off the oven and let the cast iron cool down inside the oven completely. This slow cooling helps the seasoning set and adhere properly. Don't be alarmed by a little smoke during the baking process; this is normal as the oil reaches its smoke point.
Once cool, your cast iron should have a slightly darker, slightly less dull appearance. It might feel smooth, not sticky. For the best results and a truly durable, non-stick surface, repeat the oiling and baking process at least 3-5 times. Each subsequent layer adds to the depth and resilience of your seasoning.
Maintaining Your Seasoned Cast Iron for Lasting Performance
Seasoning isn't a one-and-done deal; it's an ongoing relationship. To keep your cast iron performing beautifully:
- Clean Gently: After cooking, clean your cast iron while it's still warm. Use hot water and a stiff brush or a cast iron scraper. Avoid harsh detergents or abrasive pads that can strip away the seasoning. For stubborn bits, a coarse salt scrub works wonders.
- Dry Immediately: Always dry your cast iron thoroughly after washing. Place it on a warm burner for a minute or two to evaporate any remaining moisture.
- Light Re-oil: After drying, apply a very thin layer of cooking oil (like vegetable oil or grapeseed oil) to the entire surface with a paper towel. This replenishes the seasoning and provides a fresh protective layer.
- Cook Regularly: The best way to maintain and improve your seasoning is to use your cast iron often! Each time you cook with fat or oil, you're contributing to the seasoning layer.
For more detailed guidance on everyday cleaning and care that ensures your seasoning lasts, check out our comprehensive guide:
Unlock Non-Stick Power: The Essential Cast Iron Seasoning Guide.
Common Cast Iron Seasoning Mistakes to Avoid
Even with the best intentions, a few common pitfalls can hinder your seasoning efforts:
- Too Much Oil: This is the most frequent mistake. Excess oil leads to a sticky, gummy residue that can flake off and is unpleasant to cook on. Always wipe away until it looks almost dry.
- Not Drying Thoroughly: Any lingering moisture will lead to rust, undermining all your efforts.
- Insufficient Heat or Time: The oil needs to reach its smoke point and polymerize. Baking at too low a temperature or for too short a time won't properly set the seasoning.
- Using the Wrong Oil (or too much of the wrong oil): While many oils work, those with lower smoke points or a tendency to become rancid quickly (like olive oil for initial seasoning) might not be ideal for the baking process. Stick to high-smoke-point vegetable oils or shortening.
Embrace the Legacy of Cast Iron
Understanding
cast iron 101: how to season cast iron is the gateway to unlocking the full potential of this incredible cookware. With proper seasoning, your cast iron pieces will not only become naturally non-stick and incredibly durable but will also develop a rich, lustrous patina that speaks of years of delicious meals and cherished memories. Embrace the ritual of cleaning, oiling, and baking, and you'll ensure that your cast iron cookware continues to serve your family faithfully for generations to come, truly becoming a preserved legacy in your kitchen.